SharePoint 2010 allows you to configure your Service Application in Application Proxy Groups. By default all Service Applications ends up in the Default Proxy Group, named default. This Proxy Group is used by all Web Applications unless otherwise specified. Sometimes there is need to create specific Proxy Groups for different Web Applications, the reasons may vary but often it is a result of having different service offerings. For instance you would like to have different Managed Metadata Service Applications for different Web Applications.
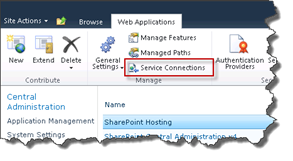
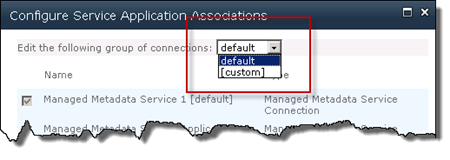
 Custom Proxy Groups can be created in the user interface (Central Administration) and is automatically created once you customize the Service Connections for a Web Application. To create a Custom Proxy group for a Web Applications you go to Central Administration and select the Web Application you would like to configure and then choose Service Connections in the Ribbon. A modal dialog window with all available Service Applications appear, this dialog contains a drop down in the top where you choose Proxy Group. This drop down contains two values by default; default and [custom]. To create a custom Proxy Group for the Web Application you just select the [custom] option and then select the service applications to use.
When you start to create a number of custom Proxy Groups it might be hard to differentiate them from each other. The name [custom] doesn’t mean anything, but that it’s custom.
Instead I prefer to name these custom Proxy Groups into something meaningful. Unfortunately you cannot create named Proxy Groups in the user interface and have to revert to PowerShell. But it’s a really simple PowerShell cmdlet to do this:
New-SPServiceApplicationProxyGroup -Name "Extranet Service Group"
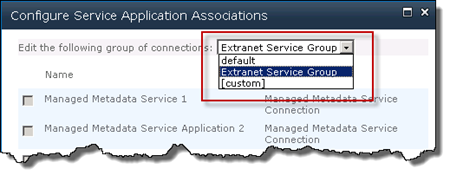
This simple command creates a named custom Application Proxy Group, in this case Extranet Service Group. Now when configuring Service Applications for a Web Application this new Proxy Group will appear in the drop down:
A far better alternative, don’t you agree?


